- Author Horace Young young@householdfranchise.com.
- Public 2023-12-16 10:35.
- Last modified 2025-01-23 11:41.
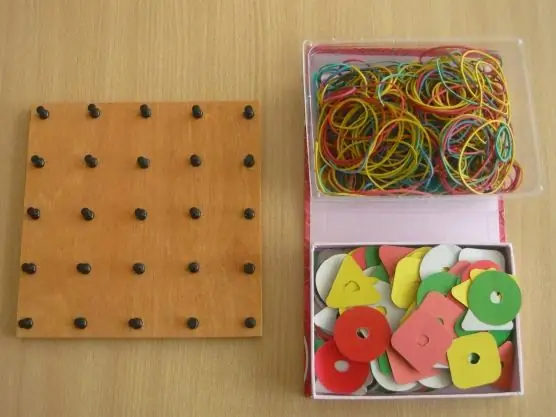
The math tablet is also called geometric and geometrical. This educational toy is useful for a child of any age, starting from 1, 5 years old. Geometrik - a board on which small pins with hats are located at the same distance. You can buy a ready-made kit for classes in the store, but it's easier and cheaper to make it yourself.

Necessary
- - a square piece of plywood or any plank not less than 40x40 cm in size;
- -silicone buttons;
- -a hammer;
- -ruler;
- - rubber bands (bank or for weaving);
- -paper;
- -pencil;
- -small pieces of plywood.
Instructions
Step 1
Through games on the math tablet, the child develops imagination, fine motor skills and cognitive abilities, including memory, attention and spatial thinking. And if you add riddles, tongue twisters, counting rhymes or fairy tales to the drawings, then this device will help in speech development. With the help of a geometr, it is easier to remember geometric shapes, to understand what a perimeter, an area, etc. are.
Step 2
Of course, the tablet can be purchased at the store, but such devices cost a lot. To make it yourself, you don't need expensive materials and a lot of time. It is important to remember that for a baby under 2 years old it is better to make a 3x3 field, for children from 2 to 3 years old - a 5x5 geometrical, and for a child over 3 years old, the tablet can be of any size. The distance between all posts should be the same, usually 3 to 5 cm.
Step 3
Before making the tablet, it is important to make sure that the child does not get hurt while playing with it. Therefore, it is better to sand the board first and, if desired, apply black acrylic paint. It is not necessary to paint, but in this case the geometrics will look more like a store one.
Step 4
In order for the buttons to be at the same distance, it is better to first make the markup on paper, then put it on the board and gently stick in the buttons, but not completely. Then remove the paper and hammer the buttons with a hammer. By the way, the columns can be made in one or different colors. And in order to make drawings with round, square and triangular elements on the tablet, they need to be cut out of thin boards or plywood, sanded and painted.


